Friday, December 31, 2010

Brain Virus

Hey it's the end of the year and time for some reflection 6 months into this crazy pusuit.

I have some wonderful observing friends to blame thank for all of this hair-shirting.  You see,  I was going to miss an observing trip because it coincided with our annual family vacation to New Mexico.  Hmmmm,  new moon ... dark skies ... I thought I could at least vicariously participate with them by doing some astrophotography.

Only one issue.  I didn't do astrophotography.

"Yeah,  I'll get a camera and some kind of lightweight mount I can ship out to New Mexico and do some killer astrophotography".  From such naive beginnings began this storyline arc.

I remember the exact moment this pernicious virus infected my brain.  April 4, 2010 at about 10:15am.

You see I was in the waiting room at the doctors office trying not to think about my appointment when it came to me.  In the 15minutes before I was called in I imagined myself peacefully taking pictures of the heavens under wonderful skies churning out stunning mosaics.  My observing pals floored with admiration.

Distraction accomplished.  Didn't matter that it was a far cry from reality.

The blog started as a way to share images with those guys while on vacation.  By then I already knew enough about astrophotography to give it this rather odd name - Cilice.  Hair-shirt ....

Here is my very first astrophoto.  June 20, 2010

Lyra.  Vega dead center.  One pixel in there is M57.
A stack of 5x30sec images, f/5.6, ISO1600, taken with the 18-55mm kit lens that came with the then 12hr old Canon T2i.  New camera smell still pungent in the warm summer air.  No flats, no darks.  I was thrilled, if not a little concerned at how hard it was to focus.  Ahhhhh, the first hint at the pain challenges to come.  But hey ... there were stars there ... and a recognizable constellation. 

Next came the real lens ... the "big gun" I was going to take to New Mexico.  The venerable 200mm EF-L.  First light on July 3, 2010.

M13.  200ml EF-L lens.  Center crop from the full T2i frame. 
Hey, this time I even used dark frames!  But ... this processing stuff sure takes a long time.  And Photoshop?  WTF?   Sigh ... this may be harder than I was expecting.  But look Ma!  There's a lot of stars there!

A couple days later I met one of my dear friends (and partner in imaging pain) at a Bay Area "dark" site.  Here was my very first big boy picture.  Darks, flats, flat-darks,  the training run for New Mexico. 

I *still* don't know where all the blue-green in the Lagoon is coming from.
This one is 40x60sec, ISO800 at f4.  Hmmmm ... once you are done fratzing with your equipment in the field you get to pound your head against the wall for hours with processing.  Then it still doesn't look like you expect or think it should.  And color?  Enough to make converting everything to grayscale the first step in processing.  But my, what fun it is.

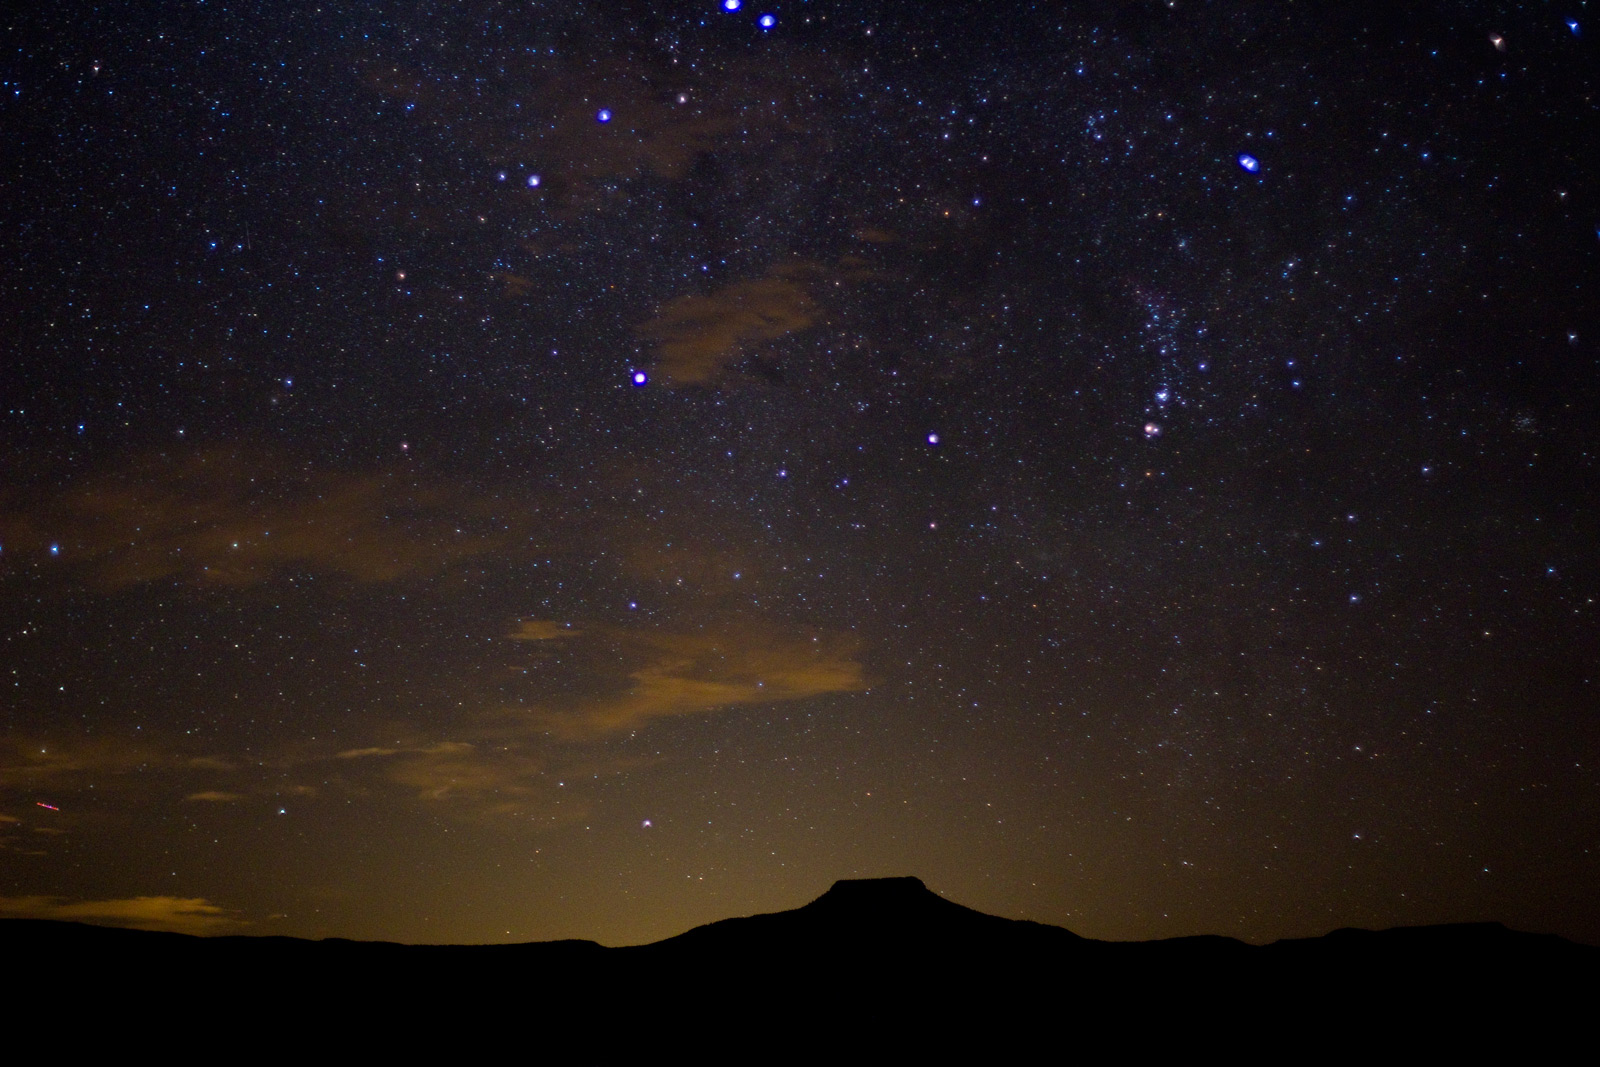
The blog starts up later in July with a 2 week trip to legendary New Mexico dark skies.  And this is what it looked like most of the time.

Beautiful but hardly astronomy friendly.
If you care you can pick up the story from the earliest posts in the blog.  Might give you some comfort and cheer while you are calibrating your light frames or contemplating what to throw when you realize you forgot to shoot flat frames.

I have suffered the good hair-shirt fight and it has all been worthwhile.  I've improved my skill and my images are getting better.  I've had something new to throw myself into at a time when I needed distraction.  I've enjoyed writing about the journey and have shared parts of it it with nearly 1000 people from 50 countries.  That's pretty neat.

I've met a few new friends and grown closer to the four who just had to go out observing when I was on vacation.  Thanks gents.  Securis in corde meo est.

Now for next year I have some really amazing ideas ....

Saturday, December 25, 2010

Timelapse Eclipse

I wasn't sure what to do with all of the pictures of the eclipse so I decided to assemble a timelapse.


Only captured the first half of the event due to clouds.  Crickets just for fun.

What a colossal pain!  There has to be a better way to do this.  Has to.  If someone knows what it is please leave some advice in the comments.  I'll describe what I did just to share the pain.

Going into any imaging session with some clear plans and goals ahead of time will save yourself a world of hurt later.  This is something I almost never do.  I hurt a lot.

If I knew ahead of time I was going to shoot a time lapse sequence I would have set up on a accurate polar aligned mount to save the painful image alignment process later on.  Also I would shoot 2 or 3 exposure times for each segment to dial in the constantly changing light as the moon is eclipsed.  Obviously this doubles or triples the number of exposures but that would have come in handy later on.

I decided to downsample all the images so I would have smaller files to deal with to assemble the movie.  The plan was to go back and do this with the full resolution pictures but it took me so long to do this with the smaller images I just can't bear to do it now ... or ever.  

Now remember my images are drifting all over the frame do to inaccurate polar alignment, re-framing, bumping the mount while checking focus and changing camera conditions.  How to align all these images?  I figured using Photoshop content aware alignment would work ... but alas it only worked on the images from the beginning of the sequence - as the moon went deeper into the eclipse photoshop got confused.  Maybe Registax?  I downloaded and fussed for a while be it was too much to learn without being absolutely sure it would give me what I wanted.

What I wanted was aligned and cropped individual images.  Maybe Registax could do that but I didn't see how. OK.  Back to photoshop.  Time to put on the hair shirt.

Load up all the images (downsized) into separate layers.  Make top layer (full moon) visible - turn off all other layers.  Blend mode difference, opacity 80%.  Make the layer immediately underneath visible and highlight it.  Manually move to align.  Turn off visibility of this just aligned layer. Select visibility of next layer down and highlight.  Align.

Repeat 150 more times.  Yeah.

As you go through toss away the bad ones.  Wrong exposure, clouds, out of focus, whatever. Oh yeah, don't forget to go back and return your blend mode and opacity of the top image to normal.

Then crop the whole mess and then save each layer as a file (at least there is a script in the file menu for that!).   Then load up all of these into iMovie (we don't do Windows in Cilice-land - I am grateful to the axemen for my conversion).  Fiddle, export, be satisfied.  It's not perfect.  Far from it.  Don't think about repeating with higher resolution.  Just *don't* do it.  Not worth it.  Really.  Don't look back.

Now go enjoy your Christmas!

Wednesday, December 22, 2010

Red Moon over Orion

After I clicked the shutter on the last image (see previous post) I had a few moments to enjoy the eclipse by eye before clouds rolled overhead.  I just don't seem to be able to watch anything for long before I want to grab the camera.  In this case I had only a couple minutes.  Like two.

I quickly removed the refractor from the travel mount and replaced it with the camera body and 10-22 EF-S lens.  Frame. Click.  Oh ... great picture of my chain link fence in the bottom half of the frame.  I've got to get to an area behind our yard with a clear view.  I grab the whole mount (it is light) and before I walk away I remember I am attached to a dew heaters and a battery.  Nice.

OK.  Calmly make sure I am not tethered and walk away again.  Up and out of the backyard trying not to stumble in the eerie not-moon light.

I plop the mount down (tick tock the clouds are coming),  point in, well, that direction, guess an exposure time and take the picture.  Oh yeah! Focusing would be helpful ... (tick tock) ...there is Sirius at least.  Focused.  Take the picture.  Whew.  I spend the next 5 minutes taking pictures with random exposure times but it was that first (focused non-chain link fenced) picture that was the best.

click image for super-size-me or here for flickr
I spent a couple hours minding the camera on the telescope taking picture after picture and occasionally looking up.  But watching Orion reach in vain for the red moon before drowning in the clouds is what I will remember from the lunar eclipse of 2010. 

Happy Winter Solstice!

Red Moon over Orion

San Jose, CA  December 21, 2010
Canon T2i (stock), Canon EF-S 10-22mm @ 13mm  f4
Astrotrac Travel System Mount
15sec exposure @ ISO800
in-camera dark subtraction

Rain on Full Moons (except on occasion of lunar eclipse)

One of the best lunar eclipses in quite some time and it is rainy and cloudy all day.  The one time I actually want to look at the moon, to watch it's blinding light get swallowed by earths shadow, and winter weather comes to spoil the party.

But come dusk, a break in the clouds.  I quickly set up shop:  Little 80mm refractor on travel mount.  Attach camera.  Focus on full moon.  Cover set up with large garbage bag so the rain gods cannot see a telescope in the open.  Go inside.  Wait.

The garbage bag must of worked as the clouds went north, south, and only occasionally by the moon.  Come showtime it was mostly cloud free until near totality.  Here is one of the last shots I took before a massive cloud bank spotted me and rushed to cover.

click a couple times for XL version

I was so very lucky to see so much of the eclipse and had forgotten how spectacular it is to watch the stars come out.

Since we are apparently stuck with a bright moon, and pretty obvious that we need rain I am of the belief that the two should go together.  Let's get our rain durning the full moons only and not waste perfectly good dark skies with clouds.  Except on lunar eclipses.  Then it needs to be clear.  I don't think that is too much to ask do you?

Lunar Eclipse
San Jose, CA  December 21, 2010
Canon T2i (stock), Astrotech AT80LE, 480mm  f5

Astrotrac Travel System Mount
1.6sec @ ISO800

Thursday, December 16, 2010

North and Up ... Now with Roadmap!

Here is an annotated version of the wide field below showing constellations and some of the brighter and most obvious objects.  If you pixel peep you can find much more especially since we are in open cluster central.  But I think the image is best appreciated when taken in all at once.

click for larger version

Tuesday, December 14, 2010

North and Up

I like widefields.  This probably stems from my enjoyment of gigapanning which I dabbled in before falling into this astro imaging black hole.  I like the perspective and the framing possibilities of a nice wide vista.

I already have a 100mm EF-L lens but found myself wanting even more reach.  I got it in my head that it would be cool to frame M31 and M33 in the same field.  I thought the 100mm would be able to do it but after a valiant attempt (laying in the dirt making adjustments while looking at the camera back) to squeeze them both into the opposite corners of the frame ....  Oh, so close but no-go.  And about a week later after Rogelio Andreo put up this image of just the conceptual frame I imagined.  He did it with a 3x4 mosaic'd panel (and considerably more skill and artistry than I would have!).  Incredible and inspiring but my skills are not up to trying a mosaic panel just yet.

So a few days before CalStar last October I ordered a 10-22mm EF-S lens.  Yeah, a bit overboard but I wanted the lens for terrestrial imaging as well.  I wanted wide ... lets go wide!

But Robert Burns knew how this would turn out.

The best-laid schemes o' mice an' men
Gang aft agley,
An' lea'e us nought but grief an' pain,
For promis'd joy !


I like the lens for terrestrial photos.  It is ... fun.  It's a good lens, not a great lens, but actually fun to use.  But as we know, a good lens, even a fun lens does not a good lens for astro imaging make.  I knew there would be aberrations at the edges of the field but there was more than I expected.  Oh, focusing.  Don't even get me started.  What a pain.  No camera back focusing here.  I had to connect to a computer and do a live view focus on jupiter just to see anything.

And then the vignetting.  Lots of it.  Flat fields that look like driving through a tunnel.  OK, a bit of an exaggeration but still.  And no sky flats possible with a field as wide as that.  I took much more time trying to get a decent flat frame than I did getting the actual images.  Much more.  In the end I took my flats off my laptop screen.

After all that ... calibrating with my flats made the images worse.  I'm still trying to puzzle that one out.  The flats severely over corrected the vignetting.  I dunno ... only thing I can think of is that my flats were not representative some how.  Something to figure out.

So after wrestling with flatfielding I decided to only calibrate with darks and bias frames and deal with the gradients in PixInsight which has some powerful tools to throw against it.  I tried a bunch of background models and finally stumbled into one that was "good enough".

Cassiopeia nearly centered.  That's Deneb and the North American nebula at left.  Andromeda upper center. And a zillion stars from the Milky Way. Click image for larger version or here for flickr.

Of course the tree was out of the field when I started but slowly crept in during the hour I was taking the images (in the end I only used 10 of the 30 2min exposures I took).  During star alignment that tree area becomes a blurry mess so I just pasted the tree from the last frame in place.

There is a lot in there.  Double cluster right of center.  M31 mid top and if you look on a larger version you will find M33 just near the top of the frame to the right of M31  (yes, by design ... I got my wish).  I should work on an annotated version some cloudy, rainy night.

So, more lessons learned.  Maybe I should have spent the time learning to put mosaics together after all.  But there is something kind of neat about this field of view.  When I was taking the images I noticed that the field was an approximation of what you see with the unaided eye.  Plus or minus.  Look North and Up and that is what you would see ... if your eye could integrate photons.

North and Up

Taken at Lake San Antonio, CA  October 9, 2010
Canon T2i (stock), Canon EF-S 10-22mm @ 14mm  f5
Astrotrac Travel System Mount
10 120sec exposures @ ISO1600
10 darks
no flatfielding, vignetting and gradients removed in PixInsight
32 bias frames
calibration, registration and post-processed in PixInsight

Wednesday, November 24, 2010

Field Geology the Hard Way

This past weekend I was in the Denver area to celebrate my neice's wedding.  Congratulations Kimberly and James!  We stayed near the Colorado School of Mines and had a few hours to walk around.  The Geology Museum was open and we spent an hour wandering around.  Highly recommended!

All kinds of cool exhibits on mining, radioactivity, fossils, UV fluorescent minerals, and gorgeous gemstones.  Walking downstairs you first encounter a pretty nifty exhibit on meteorites too.  Wandering a bit more I came across this.


Moon rocks are on exhibit in many museums but somehow I don't think I have ever seen one in person.  This is one of the Apollo 17 Goodwill pieces - two given to each state and some 135 countries.  I did some reading about these Goodwill rocks and was saddened to learn that of the 240 samples given to international governments some 180(!) are missing or unaccounted for.  Of the 100 given to the US states ... 33 are "unaccounted for".

Even this little piece has a story.  It had gone missing for decades but thanks to a lost moon rock sleuthing project run by Professor Joseph Gutheinz at the University of Phoenix it was "discovered" this summer (2010) in the possession of ex-Gov. John Vanderhoof, who left office in 1976.  The official press release covering its return to the people and display at the School of Mines states that it "had been in the safekeeping of former Gov. John Vanderhoof".  Fair enough - at least he gave it back.  And just in time for me - it was put on display only a couple months ago.

(For the record I think Joseph Gutheinz is a hero.  He assigns his students the task of hunting down these missing rocks and has been instrumental in the recover of many.)

The rock is encased in a sphere of acrylic mounted on a cheesy wooden plaque, behind a plexiglass window, inside a hefty safe.  Good idea as I so wanted to touch it.  And the safe also keeps ex-Governors from "helping".  I stood and stared trying to take in what I was seeing in that unassuming chunk of moon.  These rocks are of remarkable scientific value.  And they represent so much more.

There are three ways to get moon rocks:

1.)  Moon rocks can be found on earth, shards blasted from cratering events and finding their way to us as lunar meteorites.  I heard somewhere that the prevailing thought in the 1800's was that all meteorites were of lunar origin.  Today only a hundred some odd meteorites of lunar origin are known - the vast majority getting their start as meteoroids.  As the sites chosen for the Apollo missions have been shown to be geologically anomalous, these rocks from random impact sites on the moon have special scientific relevance. 

Certainly cheaper than going there

2.) And then there was the Soviet era robotic sample return mission(s) - which in itself is pretty amazing especially for the 1970's.  The three successful Lunas brought back a total 300 grams of samples. Here is a drawing of Luna 16, the first to bring back the goods for the Soviets.

1950's SciFi Cover Art?  Nope.  Luna sample return lander.

3.) Then there is the hard way.  Over 380 kg in all. 

Astronaut Charles Duke all dusty from a hard days field work.
I guess that is why I stared at that little piece of moon for a while.  Transfixed.

Some things really are worth doing.

I'm glad we did.

Sunday, November 14, 2010

Learning from the Sisters

As you can tell from my previous posts I've been spending a lot of time learning the basic fundamentals of PixInsight.  Using the Pleiades data that I gathered in the October new moon cycle, I've come to the conclusion that the Seven Sisters are an ideal training ground for astroimage processing.  Nice color, detailed nebulosity without being overly tricky (ala M42), some star color, and brightness variations to throw a little challenge into the mix.  A zillion amateur and professional images available on the net are also a help.  In other words a little bit of everything and nothing too difficult.

The fact that there is a detailed processing example on the PixInsight website helped a bit too.  Here is my current, um, version.  As always, click to flickr.


Encouraged by my early progress (see a couple posts back) I subsequently languished in a discouraging cycle of dead ends and restarts.  Trying more sophisticated tools against my image lead to worse results.  I finally discovered the NoiseEvaluation script and found that I was inexorably raising the noise floor as I processed deeper.  Even though I was keeping the data linear for as long as possible things just plain got noisier.  My tendency was to overstretch and otherwise use too aggressive settings and got to a place where even the sophisticated noise reduction tools in PI couldn't compensate.

Eventually I tackled learning how to do all the calibration processing in PI as well.  This is an area where PI does need some workflow streamlining - not for the faint of heart.  Nebulosity is much much easier.  But the tools in PI are powerful.  After I plowed through it I was able to get my subs to about 5-8x lower sigma SNR.  Pretty cool.  So now I was able to start post-processing with more headroom.

And well, I did only have an hour worth of exposure time.  I really shouldn't expect so much.  Two minute subs too.  But I think it is a very worthwhile learning experience to work with the same data set over and over to see just how much you can squeeze out of the noise.  Experiment often. Reprocess much. You will learn a lot which you can bring to bear on your subsequent images.

I have about 4 or 5 other image sets waiting to be processed but I've patiently spent hours and hours of time with the Seven Sisters while I learn PixInsight fundamentals.  Oh so pretty and alluring they are.  Not entirely painful company!

Pleiades

Taken at Lake San Antonio, CA  October 8, 2010
Canon T2i (stock), Astrotech AT80LE, 480mm  f5
Astrophysics AP900 mount

Guiding: SSAG/50mm Orion finder, PhD
30 120sec exposures @ ISO1600
94 darks
14 flats (1sec ISO 100

128 bias frames
calibration, registration and post-processed in PixInsight

Processing Partners

I love PixInsight.  OK, perhaps I'm getting a bit ahead of myself - after all it is those heady and exhilarating early days of relationship.  Let's just say I think this just may be the one.  We are going steady right now and I plan to pop the question even before the trial license period expires on 07:45:33 UTC December 12, 2010. 

This will not be an exclusive relationship.  Right tools for the job and all that.  I am on very good terms with my previous [processing] partner (Photoshop) and hope we will remain close friends.  We can spend quality time together on my terrestrial photography and I am sure that there may a few tricks that PS can do easier.  For those tasks we'll just go out for coffee.  But for astrophotography PS could never kindle my passion like PixInsight does.  In her heart of hearts I'm sure PS knew this day was coming. 


Contrary to popular belief, PixInsight is not difficult to get to know.  Exotic and perhaps a bit dangerous but that is part of the allure.  Algorithmic and rational.  Holistic and deep.  She doesn't paint herself or your images.  Yet watch her reveal the inner beauty lurking just above your noise threshold.  There is no user manual (yet) but this helps forge a deeper understanding right from the beginning.  And there are many who know her mysteries and are happy to share their advice.

If you are looking for a superficial one button relationship - don't bother.  You will have to invest some quality time but oh so well worth it.  You will get to learn strange and foreign sounding terms like ATrousWavelets and HDRWTransform.  You will get frustrated. Yes you will even fight at times.  But oh so richly rewarding.  If you want to inject a some fun and excitement into your processing experience ... on the next full moon invite PixInsight out for a night on the town.  You won't regret it.

Sunday, November 7, 2010

New Insight

It's been a while posting but that doesn't mean I've neglected wearing the hair shirt.

I went to the 2010 Advanced Imaging Conference which was held over the weekend of Oct. 22.  I wavered about attending.  On the positive side, it was local - and it had a really great line up of speakers. On the down side it was rather spendy and since my regular imaging pal wasn't going I wasn't looking forward to being the token "Novice Hair Shirt".

In the end it was a great experience.  Met some really nice people and the talks were entertaining and informative.  I'd recommend the conference to anyone interested in astro imaging no matter what your experience level.  Oh, and they have a nice vendor fair which was well attended - all kinds of cool toys to look over.

Rogelio Andreo (see his Deep Sky Colors web site at right sidebar) gave a fabulous talk on his imaging techniques as well as some food for thought on image composition and goals.  It was the latter that made the biggest impression on me but I'll save those thoughts for another post.   On the technical side he talked about processing images with PixInsight in which he described some of the workflow and concepts.  As he said over and over again ... "not better, just different".

A week ago I finally downloaded the trial license of PixInsight and have been slogging my way up the learning curve.  I had been working in photoshop on an image of the Pleiades I took at Calstar, so chose that as my first go with PixInsight.  Below is a comparison of the same data - preprocessed in Nebulosity and the post-processed with PS and PI.


I know if I had worked a bit longer on the PS version I would have done significantly better than the above attempt - which admittedly kind of stinks.  And the PI version is stretched till the pixels screamed and bled noise all over the image.  But I could, in a rather short time - maybe a couple hours working through some of the tutorials -  come up with a result in PI that bettered my PS attempt.

Being relatively new to image processing I haven't yet locked down my synaptic pathways in the ways of PS.  This is one of those rare situations when not knowing much may be an advantage.  I can learn a new way of accomplishing something without having the disadvantage of going through a translation step.

 So I've put aside PS for now - and decided to spend some time learning a completely new processing methodology - before becoming proficient at the one I've put months of learning into.  Beautiful.  How hair shirt is that?!

Sunday, October 17, 2010

Warm ups

Calstar 2010 is one week gone.  I did spend the extra night this year.  Ah, the extra night.  The night you hear about from the lucky few who stay one night more.  Of course it is always "the best night of the entire star party".  Inky dark.  Sugary Milky Way.  Dry.  No twinkle twinkle little star.  Is this somehow the reward for staying the extra night?

The experimentalist in me wanted to test the theory and I can say on the basis of one data point it is absolutely true.  By far the best night of the star party.  The half dozen or so of us that stayed over were spaced around the periphery of the Calstar field, guardians of our own peculiar good fortune.

My pals James and Dan close by enjoying crisp refractor views.  Rogelio and Eric at the far end creating their next masterpieces with deep, methodical expertise.   I'm there with gear akimbo intent on getting some serious time in the bank for M33.  It was a special night.

Over course of the star party I took wide fields imaged with my new 10-22mm EF lens as well as though my AT80LE refractor.  From 10 and 14mm to 480mm with nothing in between.  The EF-L lenses sat warm in the camera bag on this outing.

A week home now and faced with a few gigs of data to process I decided to warm up on what really amounted to some test exposures for the refractor.  First light for the refractor, first images with the T2i bolted onto the end, first images on the AP900, first guided exposures ever.  A lot of firsts.

 Double Cluster in Perseus.  click to flickr

There is a fair bit of curvature in the f5 field of the refractor - not surprised, I'll need some kind of field flattener.  The above is rather severe crop to make the worst bits go away.  I suppose I could have spent some more time making the stars prettier but mostly I wanted to start the processing queue with something easy.  I know I have some really challenging processing ahead.  Consider this some toe touches to get me started.

Double Cluster

Taken at Lake San Antonio, CA  October 8, 2010
Canon T2i (stock), Astrotech AT80LE, 480mm  f5
Astrophysics AP900 mount
Imaging temperature: 18-22C in-camera sensor temp
30 60sec exposures @ ISO1600
57 darks (sensor temps 18-22C to match imaging temp range)
14 flats (1sec ISO 100) 22 flatdarks
pre-processed and stacked in Nebulosity
post-processed in PS4

Friday, October 8, 2010

It was better than this ... honest!


Friday morning at Calstar.  When all the vapor of the earth rose to meet all the vapor in the sky to condense in a burst of aqueous white.  It wasn't as bad as it seems ... the early evening was plagued by clouds but later the sky did clear only to bathe us in thick films of dew.  For those armed with dew heaters the after midnight sky was actually presentable.


Despite the conditions I was able to give my new ultra-wide 10-22mm lens a try.  Amazing fields ... if I get anything worth posting you will see it here ... much later.

Tonight promises better skies.  We'll see.  Batteries charged for the dew heater burn!

Tuesday, October 5, 2010

Jiffy Pop time

It's that time of year.  The 11th Annual CalStar starparty will take place at Lake San Antonio, Oct 7,8,9.  I'm heading down early.  I don't make it to any other large multi-day starparties - for me, this is it, and my favorite.

I've done visual astronomy on and off for, well, a long time.  This will be the first year I am taking the camera.  But instead of ditching the eyepiece I've found that taking images has actually rekindled some of the old passion for observing.  I've stared at some objects for hours and hours as I processed the images - now I want to appreciate them over again using a different media.  This one more subtle, more ephemeral, more personal.

To that end, I'm actually pulling out my Obsession 18 which has been gathering dust in the garage for 3 years.(truss poles - check,  ratchet do-hickeys - check, actually packed the wheelie bars and ramps - check).  My fantasy will be to get the camera ripping pictures for an hour unattended while I calmly push the giant dob around.  More likely I'll be fussing over the camera gear, tripping over wires, then spending way too much time trying to find that first star to just start star hopping.

I'm also bringing along my AP900 mount.  The mount I bought some 10 years ago to do astrophotography - but still haven't taken a single picture with it.  How's that for making a silly purchase before I was ready planning for the future?  (counterweights - check, mounting plate bolts - check, hand paddle- check, blue tops -check).

Then there will be my trusty AstroTrac ... bing, bang it is all set up and ready to go.  Takes all the fun out of the hours of set up and fussing required for a "real" mount. (manfrotto head - check, um, huh, not much else to forget).

Three mounts, two scopes, one camera, 3 lenses.  Way too much.  And this year I'm moving a little slower.  But the way I'm thinking of it ... I'll have a lot of choices, 4 nights, and the best company one could ask for.

The *only* reason I still own a pickup truck.
The careful observer will notice that picture is a rather wide field.  Yes, first light for my newest toy.  More on that later!

Yes, time again for Calstar.  Can't wait for that 1am break time. A chance to warm the insides and enjoy the simple pleasure of Jiffy Pop shared with friends.

Friday, September 17, 2010

Lost in the Clouds

Well I pretty much buried M11 (Wild Duck cluster) in the starcloud. It's flying around in there towards the center of the frame. Yes, there.  The white splotch in the center.

I took 71x1min of data which yes, might have been over doing it a bit.  Processed to stretch the contrast between the the starcloud and Barnard's little dark nebulas. Along the way the Wild Duck kinda got lost in the fog. Oh well.

Scutum Starcloud
I've stared at this image for quite some time now and as much as I try to make myself like it ... I just don't. All the standard imager excuses apply (focus soft, tracking could have been better, star bloat, blah blah blah) but that isn't it.  Not really.

I've noticed that I develop an affinity for some images ... despite various flaws. Others are like shirts kept in the closet and rarely worn. Not the garish colored ones or those that "must have shrunk in the wash".   I mean the ones with nothing wrong per se ... just something not quite right and they are passed over again and again.

I showed this image to a friend and his jaw dropped. "You mean that is in the Milky Way? That golden carpet is, like, stars? Every dot? And what is that way cool dark stuff?  Your joking ... really?  That's mind blowing."  When I looked at it through his eyes I started to appreciate it more and more.  I still don't like it much but it sure made a huge difference to see the wonder on my friends face.

Maybe there is a shirt or two in my closet that deserves another chance.


Scutum Starcloud

Taken at Montebello Open Space Preserve, CA Sept. 4, 2010
Canon T2i (stock), 100mm EF-L @ f3.5
Astrotrac Travel System mount
Imaging temperature: 65F ambient, 29C-33C in-camera sensor temp
71 60sec exposures @ ISO1600
64 darks (sensor temps 29-33C to match imaging temp range)
21 flats (1/5sec ISO 100) 21 flatdarks
pre-processed and stacked in Nebulosity
post-processed in PS4

Saturday, September 11, 2010

M31 redux

I was looking back at all the pictures from the New Mexico trip and realized I had yet to reprocess the image of M31.  Way back a whole month ago I was wrestling with color balance issues.  I just decided to do all the processing in Nebulosity and deal with the color later in Photoshop.  I spent a couple hours this morning doing just that.

Reprocessed M31 - now with no green cast!  click to flickr
This is a center crop from the T2i frame, the full frame can be seen here.  I'm pleased how much more visible the starclouds and dark lanes are.  On some rainy day I just might see if I can find any extragalactic globular clusters and annotate them here.  Pretty cool for a 200mm lens.

Friday, September 10, 2010

How hot is *your* camera?

Story time ... but with charts and graphs and stuff near the end!

When I was out imaging last week I decided to shoot 30 second sub exposures for the image in the previous post.  The other image (still processing, up soon) used 60 second sub exposures.  So that decision meant that I would have to shoot two complete sets of darks as they must match the exposure time, ISO, and temperature of the light frames.  Typical hair-shirt move.

So at 3:30am I start shooting my darks.  At least it doesn't take a lot of skill.  Block the lens, check the ISO,  set the interval timer, sit back and ponder life's mysteries.

I said it doesn't take a lot of skill, not zero.  I still had to change the exposure time and interval for the two sets.  Thought I did, but hey, it was now after 4am.  Yes, I came home with 2 sets of 30sec darks.  Sigh.  Well, at least I had a lot of 'em.

I knew it was roughly 60F out there so my plan was to shoot my 60sec darks in the garage when the temperature was about the same.  Done.

*Insert LOST backstory sound effect*

Previously I had discussed the idea of a dark library with my imaging pal.  He thought it would be cool if one could measure the temperature of the exposure, bin them by temperature and exposure conditions and then match them to the temperature of the light frames.  Cool Beans. I knew that many DSLR's had temperature sensors from past experience shooting Giga-pans in the hot sun.  Ever see that "your camera is getting too hot" icon?  But how to get at that temperature?

Some searching led me to exiftool - a wonderful utility to extract *all* the hidden goodness from your camera image headers.  A command line utility to boot (a GUI is available for the less righteous - windows only).  But for us Mac and Linux folk it is full on shell time.  Pull up that terminal get crackin!  Some thrashing around and sure enough, with the right incantation I got it to spit out...

28 C

Time to get real sweaty and pull on another hair-shirt.  Some hours later - with shell script higgledy piggledy- a file including a table for each dark exposure was mine for the taking.

*Insert LOST return from backstory sound effect*

I knew that using Live View and heck, just shooting images, would heat up the camera (why have a "too hot" warning otherwise) but I was quite surprised by what I found.  The results are shown in the graph below.


First just follow the blue diamonds.  Start with the camera turned off and equilibrated out in the garage.  Ambient temperature steady at 60F.  Set timer to expose for 60seconds, wait 15seconds, take another.  Wash, rinse, repeat.  See temperature climb.  See temperature rise to over 90F!  Yikes.

OK.  Say you are willing to put in a 60sec delay between exposures to give the sensor time to "cool down".  Follow the red diamonds.  Better, but hey, still pushing a 20F rise in 45minutes.

Even a two minute interval doesn't buy much and I'm not waiting around that long.  An ambient temperature of 38F allows for shorter intervals and the temp levels off quicker.  But instead of a brisk 40F you are actually imaging at a balmy 60F.

A check of my light frames shot in the field show the same effect.  Only difference is the camera *starts* warm since I have taken test exposures, focused with Live View and whatnot.  Those first few shutter clicks get you warmed up in a hurry.   Guess we know where all that energy stored in the battery goes.  Huh.

The bad news is self-evident.  The good news is that it is at least possible to know the temperatures of your frames and match darks accordingly.  The not so good news it that doing that is a bit of a pain.  The great news is that one can get just fine images not worrying about this.   More shooting, less fussing = more fun.  But for those of us with a closet full of hair-shirts ... no rest for the weary.  Dang, yet another advantage those cooled-CCD folks have.

How does one use exiftool to get at all this?  I'll post what I've learned later.  For now I leave you with this handy tip.

If you are ever caught out lost and freezing in a forest ... just curl up around your DSLR and hit the shutter every minute or two until help arrives.   You heard it here first.

Thursday, September 9, 2010

Dark helps, Darks help

I made it out to Montebello with my imaging pal last Saturday night. This would be my only chance to get out this dark cycle before being sidelined by minor surgery. I'll be back in action in October but at least I have two images worth of data to process while I sit around in my jammies for a few days.

It was the first trip out after the New Mexico vacation. Montebello provides some reasonable skies considering its proximity to the greater Bay Area but New Mexico it aint. Those of you who live in super dark skies ... count your lucky (bazillion) stars.

Confronted with skyglow again I had to decide on what ISO to image with. I haven't characterized the camera (and probably won't) and frankly get tired reading about S/N and gain vs. exposure time trade-offs. The experimentalist in me says, "just do the comparison yourself". Some day maybe I will, but in that moment I just decided to throttle back down to ISO1600.

I've processed one of the two images I snagged that night - NGC253/288 region with the 200mm EF-L.   I rather like wide field frames of objects normally imaged at higher focal length. Not as flashy but it does give another perspective.

NGC253 and 288.  Canon T2i full frame at 200mm f.l.

Wow ... do dark skies make a difference. Noise was not my issue in New Mexico, even at ISO3200. This image had all kinds of noise that I had to beat down. But dark frames do help, and the more the better. I took 64 darks to throw against this and I still had more noise than I expected.   I was also too lazy tired to re-adjust polar alignment and had some trailing so I shortened exposures to 30seconds each (I took 60 for 30minutes of accumulated exposure time).

Below is a MacBook Pro 17 crop of the galaxy and globular cluster.

crop to the good stuff.  click to flickr
Stare at the center of our galaxy and look between your feet.  This view is just about straight down out of the plane of the Milky Way and NGC 288, the globular cluster, is hovering nearby at 28,000 light-years distant.  The Great Sculptor Galaxy, NGC 253 is over 400 times further away at some 11.5 mega light-years distant - one of our "just down the block" galactic neighbors.  Nifty. Burnham says 253 was first observed by Caroline Herschel which makes that a double Nifty.

Perhaps under a darker sky in October I'll try this again and put a lot more photons in the bucket.  An hour to 90minutes would do this pair some justice.

Saturday, September 4, 2010

The First is Last

This is the last of the images from our 2010 trip to New Mexico.  I just realized that this picture of the southern Milky Way ...

[south from this latitude anyway - would be amazing to see this at the zenith! note to self, must travel with gear south of the equator]

... was the very first of the trip way back on August 3rd.  I remember being so excited to finally have a break in the monsoon storms.  I waited about 9 days for that.  It was still cloudy that night and I shot 16 60sec exposures before the clouds came charging through.  It was first light for the 100mm EF-L lens - I hadn't even taken a terrestrial shot with it yet.  Still had that, ahhhh, new lens smell.

Old Friends.  click to flickr
Only 16min of data but it probably would have taken me an hour to pull out this signal from the skyglow back home.

There is the Trifid and Lagoon floating in the shoals of their inky pool.  The globular cluster M28 off to the left looking almost star-like in this wide field.  Thousands of stars masquerading as one.  The open cluster M23 sparkling jewel like, just peeking into the frame in the upper right.  The comfort of old friends revisited. 

Taking a picture of this area is like photographing Half Dome in Yosemite - standing next to hundreds of tourists all pointing their cameras at the amazing vista. One of the most photographed areas of the sky.  Iconic. You have seen hundred of pictures.  You have seen it dozens of times with your own eyes.  Yet you are drawn to take yet another picture as a keepsake of this particular meeting.  You almost have to.

In the end 3 partial nights dodging clouds and moving from object to object.  I had one perfect night when I snagged an hour each of M33 and M32 before the moon rose.  Six images.  Hours and hours of processing images late into the night after returning home.  Simply perfect.

But now I'm out of data.  Must. Get. More.   Hmmm,   It's been about a month.  Dark moon cycle.  Hey Marek ... wanna go to Montebello tonight and shoot some stars?  I'm in!

Southern Milky Way
Taken at Ghost Ranch near Abiquiu, New Mexico August 3rd, 2010
Canon T2i (stock), 100mm EF-L @ f3.2
Astrotrac Travel System mount
Imaging temperature range: 60-62F
16 60sec exposures @ ISO3200
50 darks, 20 flats (1/5" ISO 100) 20 flatdarks
pre-processed and stacked in Nebulosity
post-processed in PS4

Tuesday, August 31, 2010

Pale Blue Dot

I processed another image last night.  This morning I showed it to my 6 year old daughter and asked her what she thought of it.  After some thoughtful consideration she said, "it's the Earth".   Kids always see the the obvious.

"Earth"  aka M27, the Dumbell Nebula
When she said that I was reminded of the "Pale Blue Dot" image.  In case you don't remember refresh your memory. Pale Blue Dot.

But of course it isn't the Earth - it is a very wide field image containing the planetary nebula,  M27 "the Dumbell Nebula".   In a planetary nebula, atoms of the expanding gas shell are excited to emit light by a super hot central star.  I explained this to my daughter and she wanted to know how much bigger it is than the Earth.

hmmmm.  Wikipedia to the rescue.  About 1.4 light years radius in the long direction.  Wow.  Bigger than I thought.  Unsure how to explain a light year to a 6 year old ...
{I mean really, I know what a light year is.  I'm just not convinced we humans can meaningfully connect with distances much beyond our direct experience.  I can imagine it.  Just can't feel it. }
    ...  I just settled for "much much bigger than our whole solar system".  You know ... we all know how big that is right?

Unfazed she replied, "so, bigger than a million billion Earths".  She likes that number - million billion.  If she can hold that in her head then maybe I should ask her about the whole light year thing.  Anyway, I quickly answered in the affirmative and scooted us down for breakfast before she prodded longer at the edges of my knowledge.

This isn't a very common image scale to show off M27.  I just wanted to shoot something with my new 100mm EF-L lens and it was cloud free in Velpecula at the time.  In truth I thought it would be larger.  But I kind of like the perspective - especially since I now know it is 2.8 light years across.  Also in the image is a bunch of open clusters and a globular cluster.  Can you find it?

Here is an extreme crop of the frame.  Pretty cool what 100mm focal length projected on a 18M pixel sensor can do.


It didn't occur to me until I was writing this that early observers of these objects coined the term planetary nebula because of their similarity to the planets.  Exactly what my daughter thought.  She would be in good company with Messrs. Messier and Herschel.

Image details:
M27
Taken at Ghost Ranch near Abiquiu, New Mexico August 3rd, 2010
Canon T2i (stock), 100mm EF-L @ f3.2
Astrotrac Travel System mount
Imaging temperature range: 60-62F
19 60sec exposures @ ISO3200
50 darks, 30 flats (1/5" ISO 100) 28 flatdarks
pre-processed and stacked in Nebulosity
post-processed in PS4

Saturday, August 28, 2010

Flickr goodness and more

OK, so say you have some hard won images that you want to share.  Now what?   You could:
  •  Print them and hang it on a wall (let's hold off until we get something worth printing first).
  • Save them on your laptop and show the occasional passerby. Interactive but rather limited in audience.
  • Email them to people.  Easier but kinda pushy.
  • Start a blog.  This works better - you can let people know it exists and then they can visit or not.  You have the option to share more widely.  Somewhat interactive if you enable comments.  You can advertise as widely as your ego desires.  Good if you feel like writing in addition to displaying the images.
  • Post to relevant forums.  Option to direct people to blog or other distribution point. Highly interactive. Invites co-dependent commenting with such heartfelt and detailed sentiments such as: "Wow!" or "Nice pic!"
  • Use one of the bazillion photo sharing sites.  But which one?
  • Some combination of the last three.
I'd like to use this blog as a central hub.  But might be nice to have the linked images on a photo sharing site.   They all have advantages and disadvantages.  Zenfolio, pbase, Picasa web albums, Flickr and so forth.  I already have Flickr and Picasa web album accounts but discovered something really cool about Flickr last night.  If you share one of your images with the astrometry group and they will plate solve your image, post some nifty info in the comment field, and highlight interesting features ... like this:


When you mouse over one of the boxes there is a little pop up that identifies the object, star or whatever.  Very cool.

If you want to try it just go here:

Try it!

Just mouse over the image.  Below is some other info like the pixel scale and such.


But wait!  There's more.  Down in the comment field is a link to the World Wide Telescope.  Click that and your image is overlaid on the whole sky map.  Bazinga.


How cool is that?  So for now Flickr gets the nod.   Now I'll have to figure out how to connect Flickr and blogger in a peaceful way.  Ain't technology great? 

M16 M17 region picture overlaid on World Wide Telescope celestial map

Broken chips at the bottom of the bag

I'm absolutely craving some potato chips.  Ruffles would be nice but I wouldn't be picky.  We usually don't keep potato chips in the house, and it is well after 12:30am, so I don't think there are any in my immediate future.

I was finishing up this image when I started to think about potato chips and I made a connection (ok, so cut me some slack - it's 12:38am Saturday night after a looooong work week).   I'm down to the crumbs at the bottom of the bag with the remaining images from my trip to New Mexico.  Flawed yet still flavorful.  I won't be embarrassed - I'm reaching in and licking my fingers.

This image of M16, M17 was taken on the very first night I had *any* clear skies.  I took 35 images before I was clouded out.  In the end I only had 18 minutes of usable sub-frames.  It was also the first image with my 100mm lens and I didn't quite hit focus - I was in a rush because of the clouds.  Pity.

I really like these wide fields.  Might have something to do with having done so much visual astronomy over the years where a 1 degree field is HUGE.  This image is like 7x10 degrees.

A forest for the trees kind of thing.  It looks much nicer if you click the image to get the full crop.


A forest full of stars.
 
M16, M17 region
Taken at Ghost Ranch near Abiquiu,  New Mexico August 3rd, 2010
Canon T2i (stock), 100mm EF-L @ f3.2
Astrotrac Travel System mount
Imaging temperature range:  61F
18 60sec exposures @ ISO3200
60 darks,  28 flats (1/5" ISO 100) 30 flatdarks
pre-processed and stacked in Nebulosity
post-processed in PS4

Tuesday, August 24, 2010

Godspeed Jack

`` `Keep Looking Up' was my life's admonition;
I can do little else in my present position.'' 


PBS's Jack "Star Hustler/Star Gazer" Horkheimer's self penned epitaph.  

He died last Friday, age 72.


You will be missed.


Monday, August 23, 2010

One of Four

The image below is one panel of a 4 panel mosaic.   Just wait until you see the full thing.

Well, take a seat because it's gonna be a while.

OK, so the image is one panel of a 1 panel mosaic.  If you have been following along at all you know that my time in New Mexico - as wonderful as it was in every way - only had one perfectly clear night.  That night I imaged M32 and M33 before the moon came to spoil the party.

The other nights, some of which were quite nice thank you, were only partly clear (or partly cloudy as the shift in emphasis might have it).  It was one of these other nights, when it was "oh man-o-man this is gonna be great" clear I decided to shoot a 4-panel mosaic of the Milky Way in Cygnus.  Oh, maybe an hour exposure time each.  Yeah - have to spread it out over two nights.  No problem. 

Forty-three minutes into the first panel ... clouds.  High, thin, and hardly noticeable by eye.  Through the camera lens it is like looking through a window pane smeared with Vaseline.

So, the mosaic idea didn't pan out.  A night or two later I decided against any ambitious plan that would hinge on the necessity of another clear night.  Too big a gamble.  However I did get 43minutes of the first panel ... and at least I did start with a frame that had a "marquee" object - the North American nebula (and Pelican to the right).

Came out OK I think.  Really wrestled with the whole  "what color should I make it" thing.  I settled on a more bluish purplish look.  Blown out, eye-popping reds are just so ... well, red  {you see, I'm just jealous of you narrow-band imagers}.  I didn't want to just make it red because it is supposed to be red (even though it is, kinda sorta).

Color is proving to be more of an issue for me than I thought.  There is science, art, what "sells", and what makes me happy on a given day.  The color palette might be the same or different for all of them.

In deference to my current situation I'm going to let the last option guide me.   

I'll finish that 4-panel someday.  I'd be thrilled if you were still here waiting for it.

North American Nebula
Taken at Ghost Ranch near Abiquiu,  New Mexico August 4th, 2010
Canon T2i (stock), 200mm EF-L @ f2.8
Astrotrac Travel System mount
Imaging temperature range:  58-62F
43 60sec exposures @ ISO3200
60 darks,  21 flats (1/5" ISO 100) 21 flatdarks
pre-processed and stacked in Nebulosity
post-processed in PS4

Sunday, August 22, 2010

Sometimes you just got what you got

I'm pretty slow sometimes but processing this image of M33 taught me something.  You can spend as much time as you want processing an image hoping to stumble across some arcane photoshop command-alt-clickery that will extract ever fainter photons that just aren't there.  Yeah, sometimes you just got what you got.  Be satisfied.

I learned a lot this time around.  Blue-Red channel trickery to kill the green weenie.  Color halo reduction. All kinds mask selection/load/subtract-ery.  Good stuff - and absolutely no way to reproduce how I got to the endpoint.  However ... I am repeating to myself ... be satisfied.

At 200mm the image scale for M33 isn't all that great.  At least compared to M32.  It's smaller than I remembered :).   I was also a bit surprised that 60 min didn't pull out more.  A late rising moon just below Kitchen Mesa accounts for the still persistent gradient in the lower right corner.  The presentation could be improved but dear reader ... there simply ain't no mo' photons.  I give you all I have.

You know what?  I'm satisfied.  Mostly :)    Hanging up the hair-shirt for a bit before I tackle another set of data from the New Mexico trip.  Click for larger image.

M33  Macbook Pro 15 center crop


Taken at Ghost Ranch near Abiquiu,  New Mexico August 6th, 2010

Canon T2i (stock), 200mm EF-L @ f2.8
Astrotrac Travel System mount
Imaging temperature range:  52-54F
60 60sec exposures @ ISO3200
64 darks,  21 flats (1/5" ISO 100) 21 flatdarks
pre-processed and stacked in Nebulosity
post-processed in PS4

Sunday, August 15, 2010

M31 ... now in Color!

I spent a couple, a few  5 hours today trying to get a handle on the color image of M31.  First I had to figure out the best settings in Nebulosity for the debayer step.  There are no default settings for the T2i - the camera is still rather new.  While I could have chosen just about any setting and done the color correcting later (in Nebulosity or PS) my previous attempts were rather garish.

To get a handle on this I took a RAW picture outside in sunlight that included a gray card.  Verified in PS that the RGB values were the same (check).  Then I opened the file in Nebulosity and debayered with every setting possible (hair shirt?  check).  Then I wrote down the RGB values reported by Nebulosity for the same spot on the nominally gray card and selected the conversion profile that gave the "most gray" (equal RGB) values (double hair shirt, check).

Next I proceeded to reprocess all the images with the new setting.  Which, by the way if you are reading this and happen to be in same situation and don't want to spend 2 hours going through the exercise the answer is ... ta-da ... straight color scaling (not a specific camera like stock 40D or unmodded 300D or whatever).

After all that I cropped and did a Auto Color Balance.  Saved every file en route.  Then I post processed the image in Nebulosity.  The spirit was willing but the body was too weak to start postproc in Photoshop.

The image is still too pale, greenish bluish or something.  And I have orange star halos, some noise to bang down and so on.  After some well deserved rest I'll tackle the image again in Photoshop to see what I can do about color issues.  In some sense I like the more muted colors.  Going forward I'll have to think about how I will use colors in these images.  But, for now, here is M31 in all it's Ghost Ranch glory.

As for all images ... click to see a larger version.
M31 processed entirely in Nebulosity


Taken at Ghost Ranch near Abiquiu,  New Mexico August 4th and 5th, 2010
Canon T2i (stock), 200mm EF-L @ f2.8
Astrotrac Travel System mount
Imaging temperature range:  52-58F
87 60sec exposures @ ISO3200  (taken over two evenings)
64 darks,  21 flats (1/5" ISO 100) 21 flatdarks (still not sure about needing these)
pre and post-processed in Nebulosity

Drive that Spike

Remember that post about making the bobby pin Bahtinov mask ... the "Happy Face"?  I ended up using it only once.  Well, there was only one night worth using it but that is beside the matter.  On *that* night I wanted everything to be as good as I could make it so I figured since I spent so much time making the blasted thing I might as well use it.

Focusing is a hard.  Like real hard.  Especially with a short focal length camera lens at wide open f-ratio. The slightest touch of the focus ring (no - autofocus doesn't work - too dark even on a bright star) is enough to make your stars look like they have had nothing but Micky Dees super-sized combo meals for a month.  That and surrounded by halos of all colors.  Bah!

For this trip I mostly just used live view on the Canon back mag'd up to 10x and tried to make the stars as tiny as possible.  Worked well enough for the conditions.

Here I took a picture at ISO3200 for 5 sec then reviewed on the camera back (blown up 10x) and by the tiniest touches tried to get that middle spike in between the X.  Back and forth.  Nudge, shoot, review, nudge, shoot, review (say naughty word), nudge, shoot, review (say naughty word), nudge ... you get the picture.  I kept the last picture, said "good enough", resisted the temptation to touch focus again without the mask and carried on with imaging.

Handy tip ... remove Bahtinov mask before imaging run.  Yeah.  Wouldn't that be something.

Fortunately I had to frame my shot with test exposures and noticed the stars were all dim and funny looking.  Yikes.
Center the Spike!  Bahtinov focus on 200mm Canon EF-L at f/2.8

I only just now thought to take a look at that image under the light of day.  Much easier to see on the computer screen than while on your knees craning your neck to see the camera back.  Looks pretty good - just a touch off - but it would have taken luck to place that spike any better.  The only way would be to use a fine motion focus ring attachment - something I have been working on.  More on that another day.

I'm happy with the focus on the Andromeda shot - don't really think I could have gotten it any closer.  The Bahtinov mask is cool and a real savior for those imaging with telescopes.  I'm not sure it is of much help with 200mm or smaller camera lenses, but it was fun to make while the storms rolled by.

Friday, August 13, 2010

The Abscence of Color

It would appear the imagers job is never done.  All images are a "work in progress".   You just know you can add some more data ... process a little more ... learn some secret dark art that will make the image pop.  I'm not immune.

Friend(s): "So!  Did you get any pictures of the sky?"

Me: "Ah, yeah, a few.  But there were clouds ... had one good night ... will take me a while to process them"

Friends(s):  (losing interest quickly) "oh, ok ... let me see something when they are done then".

What they don't realize is they will *never* be done!   sigh.  So in order to combat this illusion of progress through motion I will post up what is likely the only good image from the trip ... in B&W.  I gray-scaled the image because I am having a nasty time trying to get the colors figured out.  All RBG debayering channel sensitivity hoo-ha.  Really starting to get me PO'd.


M31, M32, M110  (Andromeda galaxy and companion elliptical galaxies)

Canon T2i, 200mm EF-L @ f2.8
Astrotrak Travel System mount
87 60sec exposures @ ISO3200  (taken over two evenings)
64 darks,  21 flats (1/5" ISO 100) 21 flatdarks (still not sure about needing these)
preprocessed in Nebulosity
post processed PS4

Color will follow when/if I get that figured out.  Just hate throwing away all *that* data.

Sunday, August 8, 2010

Expectation Management

hmmmm ... now that didn't quite go as anticipated.  I look at the date of the last post and it was a full 8 days ago.  Storms, aging hardware and people not quite so sure how to cycle a router (or if they should even trust a guy who looks like he just wandered in from the outback to do it) all conspired to keep me off the net.

So here it is a full week later and we have arrived back home.  Home where the signal is strong and bandwidth abundant.  Somehow the trade doesn't seem even.

No, my heart is still on that mesa.  Sitting on a cold folding chair, my tracking mount and camera ready for any break in the clouds.  Hours out there.  Everyone else asleep.  Hour after frustrating hour.

I loved every minute of it.

I was talking to a woman while waiting in line for lunch a few days ago.  She was relaying her disappointment of a hike canceled due to lightning but instead she got to spend a few hours connecting and talking with her grand daughter while watching the weather pass.  Understanding, I told her that Ghost Ranch is all about "expectation management".  She said "oh, I have the remember that ..." and pulled out a pen and began scribbling in a notepad.  Having someone write down something I say at a place where world famous writers, poets and artists hang out was amusing to say the least.  But the more I thought about it the more I could see it for myself.

I didn't get 13, 7, 4 or even 2 incredible nights to image the heavens.  I did get some quality time on a cold rusty folding chair with views like this to keep me company.